Materials
- Yarn:
- King Cole Merino Blend Chunky (100% superwash wool, 74 yd / 67 m per 50g ball):
- 3 [4] × 50g balls in Old Gold (A)
- King Cole Merino Blend DK (100% superwash wool, 123 yd / 112 m per 50g ball):
- 1 × 50g ball in Black (B)
- King Cole Baby Alpaca DK (100% pure baby alpaca, 110 yd / 100 m per 50g ball):
- 1 × 50g ball in Camel (C)
- King Cole Merino Blend Chunky (100% superwash wool, 74 yd / 67 m per 50g ball):
- Hooks: 3mm, 5mm, 6mm
- Notions:
- 2 brown buttons (¾–⅞ in / 2–2.25 cm)
- 2 black buttons (½–⅝ in / 1.25–1.5 cm)
- Darning needle, sewing needle, black thread
- Small amount of toy stuffing
- Thin card to make pompoms
Size:
- Child (20 in / 51 cm head circumference)
- Adult (22 in / 56 cm head circumference)
Gauge:
13 sts × 14 rows = 4 in (10 cm) over double crochet on 6mm hook.
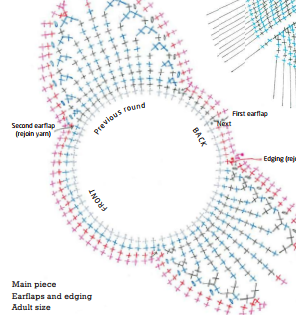
Sizes
- Child: up to 20 in (51 cm) head circumference
- Adult: up to 22 in (56 cm) head circumference
Tension:
13 sts and 14 rows to 4 in (10 cm) over double crochet on 6mm hook.
(Use larger or smaller hook if necessary to obtain correct tension.)
🪡 Method
The main part of the hat is crocheted in rounds, starting from the top and increasing the stitches to shape the crown. The earflaps are crocheted in rows and decreased to form a triangular shape. The leopard’s ears are worked in rounds, lightly stuffed, and attached to the hat along with a crocheted nose and leopard spots. Buttons are used for the eyes. You can add extra spots for a denser leopard print pattern if desired.
🔸 Main Piece
Start at the top of the hat with 6mm hook and yarn A.
- Ch 4, join with sl st to form a ring.
- Rnd 1: 1 ch (does not count as a st), work 6 dc into ring, sl st into first dc (6 sts).
- Rnd 2 (inc): 1 ch, (dc2inc) ×6, sl st into first dc (12 sts).
- Rnd 3 (inc): 1 ch, (dc2inc, 1 dc) ×6, sl st (18 sts).
- Rnd 4 (inc): 1 ch, (dc2inc, 2 dc) ×6, sl st (24 sts).
- Rnd 5 (inc): 1 ch, (dc2inc, 3 dc) ×6, sl st (30 sts).
- Continue increasing this way up to Rnd 10 (60 sts).
- For Adult size, work Rnd 11 (66 sts).
- Work even (1 dc in each dc) for 16 [18] rounds more.
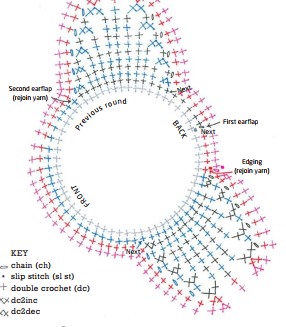
Earflaps
First earflap:
Starting at the center back, 1 ch, work 1 dc in next 5 [6] dc.
Work in rows, shaping the triangle by decreasing:
- (dec row): 1 ch, dc2dec, 1 dc in next 9 dc, dc2dec, turn (11 sts).
- Continue decreasing on both sides until 3 sts remain. Fasten off.
Second earflap:
Rejoin yarn at the front of the hat, work 1 dc across the next 24 dc, then repeat the same earflap pattern as above.
🔸 Earflap Facings (Make 2)
If you plan to add a fleece lining, you can skip this step.
- With 6mm hook and yarn A, make 14 [16] ch.
- Row 1: 1 dc in 2nd ch from hook and each across (13 [15] sts).
- Edging: Using 5mm hook, work evenly down one side, around the tip with 3 dc, and back up the other side (25 [29] sts).
Fasten off, leaving a long tail.
🔸 Ears (Make 2)
- With 6mm hook and yarn A, ch 4, join to form a ring.
- Rnd 1: 1 ch, 5 dc into ring, sl st into first dc.
- Rnd 2: (dc2inc) ×5 (10 sts).
- Rnd 3: (dc2inc, 1 dc) ×5 (15 sts).
- Rnd 4: (dc2inc, 2 dc) ×5 (20 sts).
- For Adult size, add one more increase round (24 sts).
- Work even for 4 [6] rounds.
- Lightly stuff, flatten, and stitch edges together. Sew ears onto hat.
🔸 Nose
- With 3mm hook and B, make 4 ch and join to form ring.
- Work 6 dc into ring.
- Increase evenly to 24 sts (child) or 32 sts (adult).
- Flatten the nose, sew the top edge together, and attach to front center of hat about 1.5 cm above lower edge.
🔸 Spots
Create spots using Camel (C) for the base and Black (B) for edges.
- Tiny (×10): 5 dc into ring, join B, (dc2inc) ×5.
- Small (×10 [6]): 6 dc into ring, (dc2inc) 3 times, join B, (dc2inc) 3 times → 18 sts.
- Medium (×6): Work 5 dc into ring, switch to B halfway, increase to 15 sts.
- Large (×6 for adult): 6 dc into ring, (dc2inc) ×6 → 18 sts, add 1 more increase round in B.
Arrange and sew the spots randomly or symmetrically across hat.
🔸 Edging & Assembly
- With 5mm hook and yarn A, work evenly around the edge of the hat and earflaps.
- Increase 3 dc at the lower corners of each earflap.
- Join earflap facings by crocheting through both layers together.
- Weave in all ends.
Attach eyes: Sew black buttons over brown buttons for a layered, realistic look.
Attach cords & pompoms:
- Make two twisted cords (A), each 8 [12] in (20 [30] cm) long with 6 [8] strands.
- Make two pompoms (A), 2 [2⅜] in (5 [6] cm) wide.
- Attach one pompom to each cord end, then sew cords to the earflap tips.
🔸 Optional Lining
For extra warmth, add a cozy fleece or crocheted lining.
(See lining instructions, pages 142–145 of the original guide.)
🧵 Finishing Touches
- Stuff ears slightly to keep their shape.
- Position and sew spots evenly.
- Weave in all yarn tails securely.
- Block lightly if desired for perfect shape.
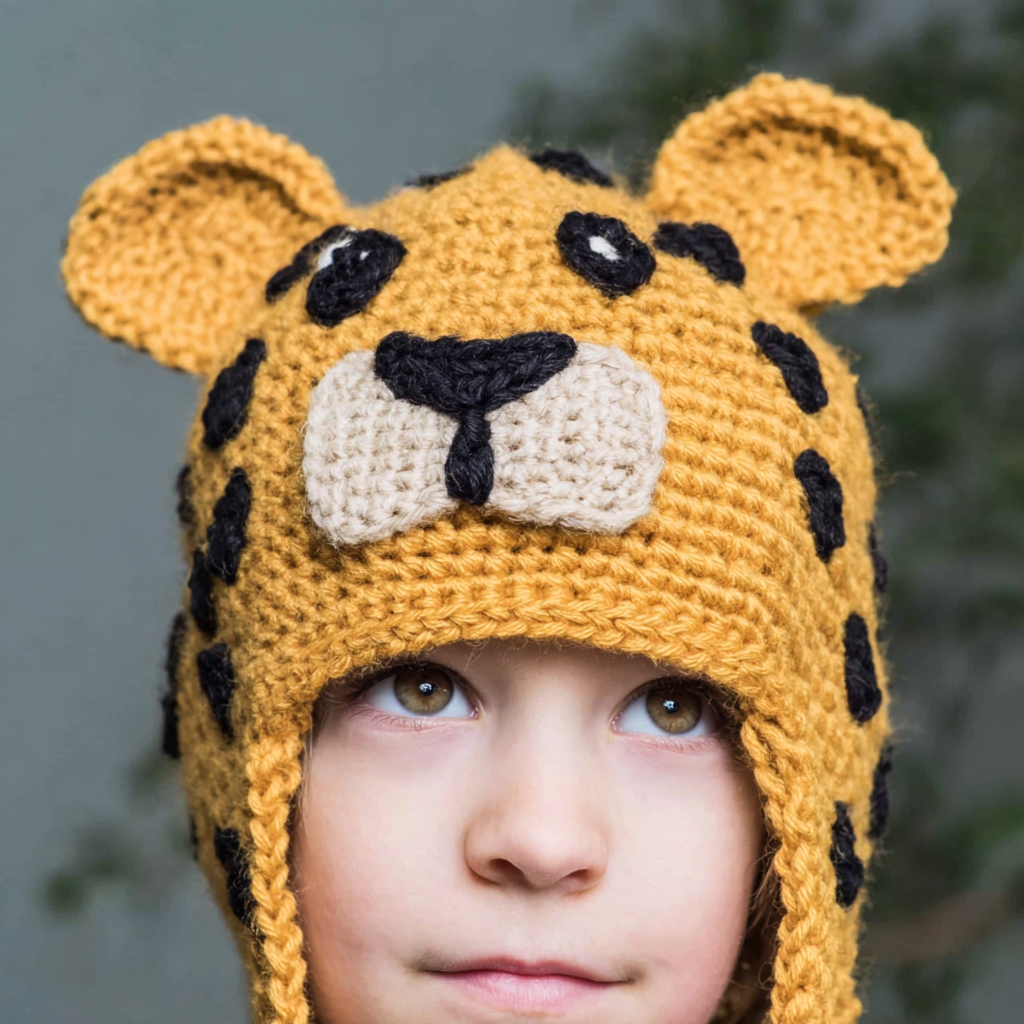
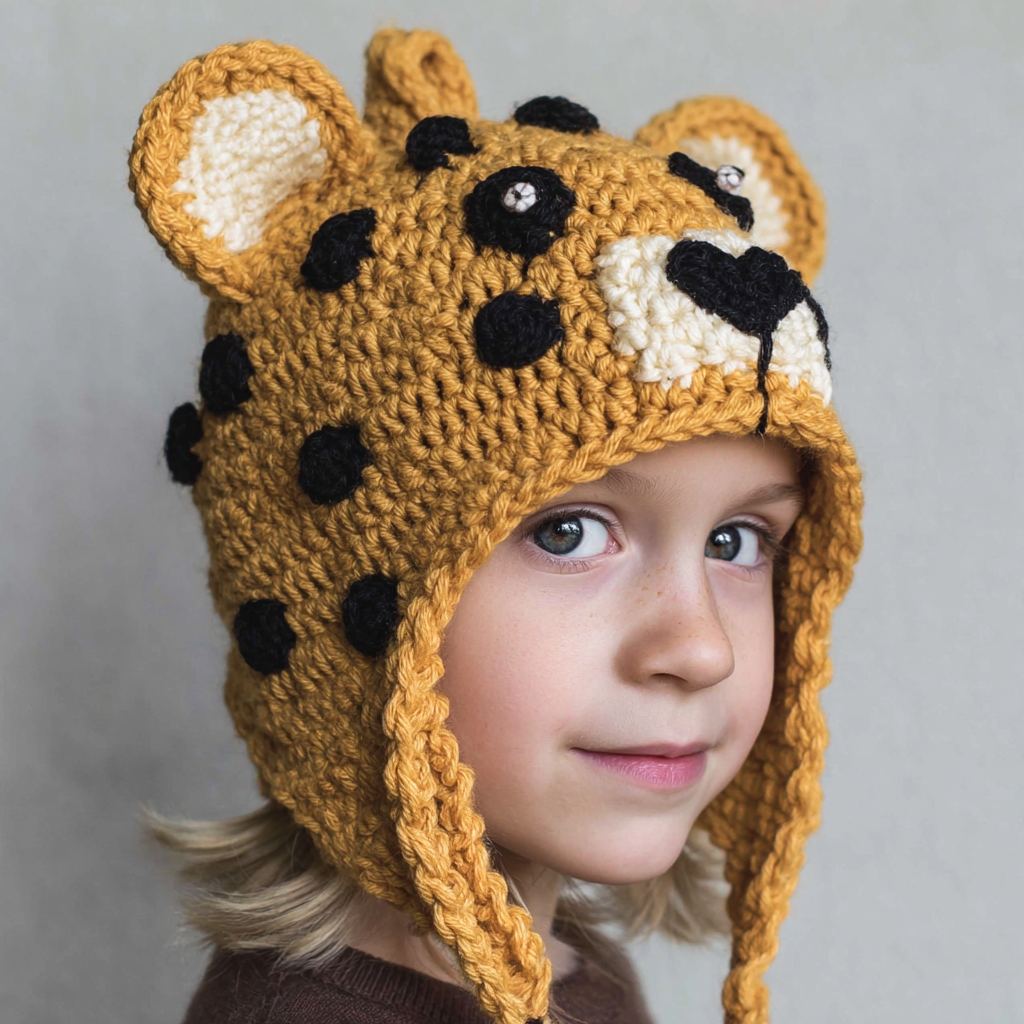
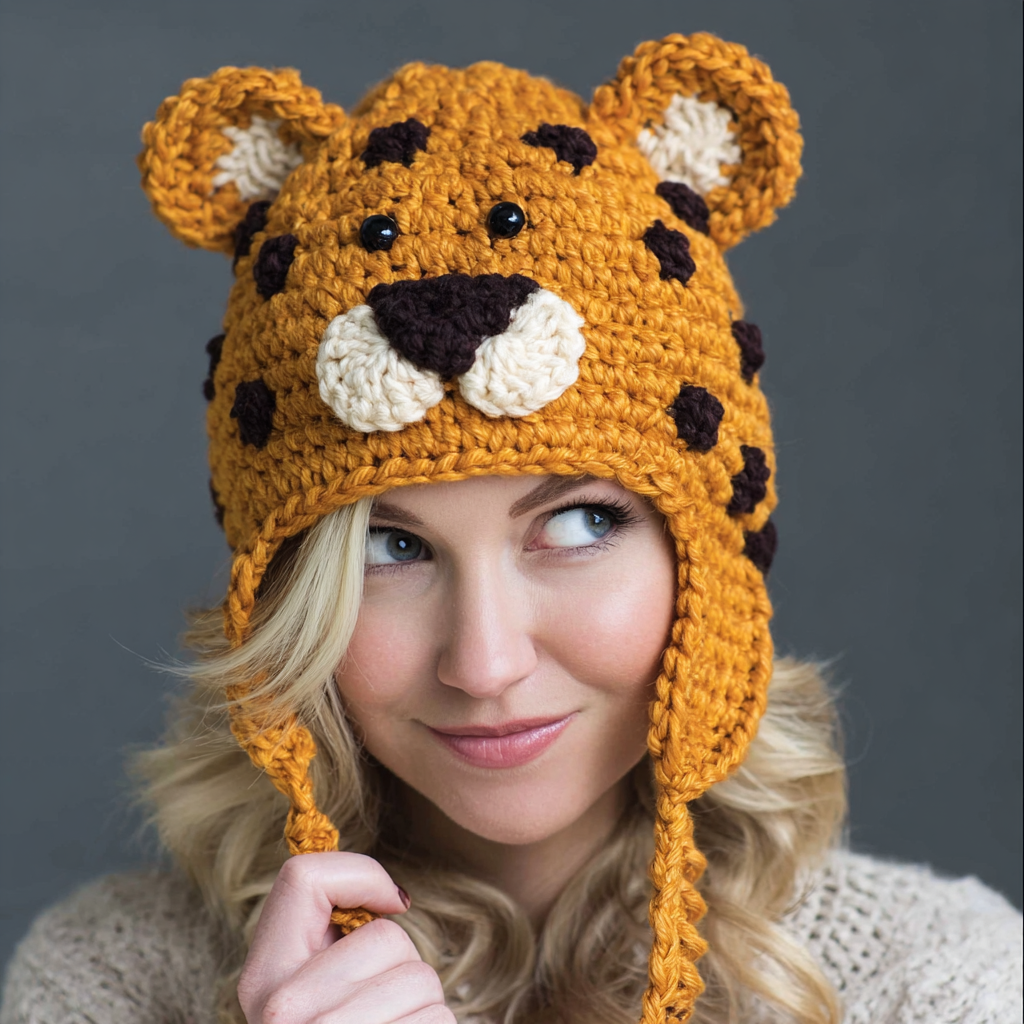
✅ Final Look
Your leopard crochet hat is ready — soft, chunky, and irresistibly wild! This charming handmade accessory will add playful style to your winter outfits or make a delightful handmade gift for kids and adults alike.
Leave a Reply